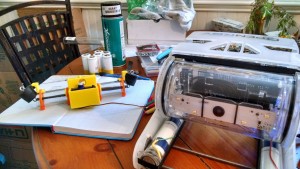
 The Niskin bottle, a seemingly simple tube designed to take water samples at discrete depths, is one of the most important tools of oceanography. Coupled with a CTD, an array of Niskin bottles fit into the rosette, a Voltron-esque amalgamation of everything an oceanographer needs to profile the ocean. Niskin bottles are neither cheap nor particularly easy to use. A commercial rosette requires a decent-sized winch to launch and recover, which means you need a vessel and a crew to deploy. For Rogue Ecologist and citizen scientists, getting a high-quality, discrete water sample is a perpetual challenge. With tools like the OpenROV and the soon-to-be-completed EcoDrone, I wanted a Niskin bottle that was light weight and capable of being mounted on both underwater robots and quadcopters with ease.
Until now.
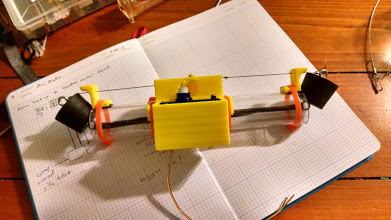
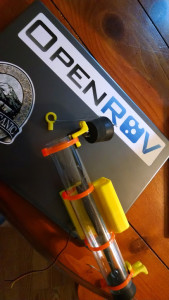
After a few months of brainstorming and planning, I sat down this Friday and began building a 3D printable Niskin bottle that could be hand deployed or mounted on an OpenROV or drone. While this version is designed around a 1.25 inch acrylic tube, the trigger mechanism can be expanded to fit any size pipe. The trigger is driven by a waterproof servo developed by the good folks over at OpenROV. Everything else can either be purchased off-the-shelf or printed on you home 3D printer. Later this month, I’ll be taking my prototypes out on the RV Blue Heron for field testing in Lake Superior.
Bill of Materials
Niskin bottle files from my YouMagine page. I print using a Printrbot Simple Metal. You’ll also need a high strength elastic band, the exact type will vary depending on the final length of you bottle. I use a bisected 27 inch bicycle inner tube. Surgical tubing would also work well. And, of course, you’ll want a whole mess of zip ties and 1/4 paperclip.
You will also need an OpenROV prototype underwater servo. These devices are still in the experimental phase, and I’ll be pushing a few to failure during the Blue Heron cruise.
Assembly
Print out all the parts. If you want to mount the bottle to the payload bay of an OpenROV, print the NiskinOpenROVClip.stl file. While everything is printing, screw the crown bolts into the rubber stoppers, on both ends. Cut the polycarbonate tube to desired length, debur, and chamfer the inner edges to prevent the stoppers from catching.
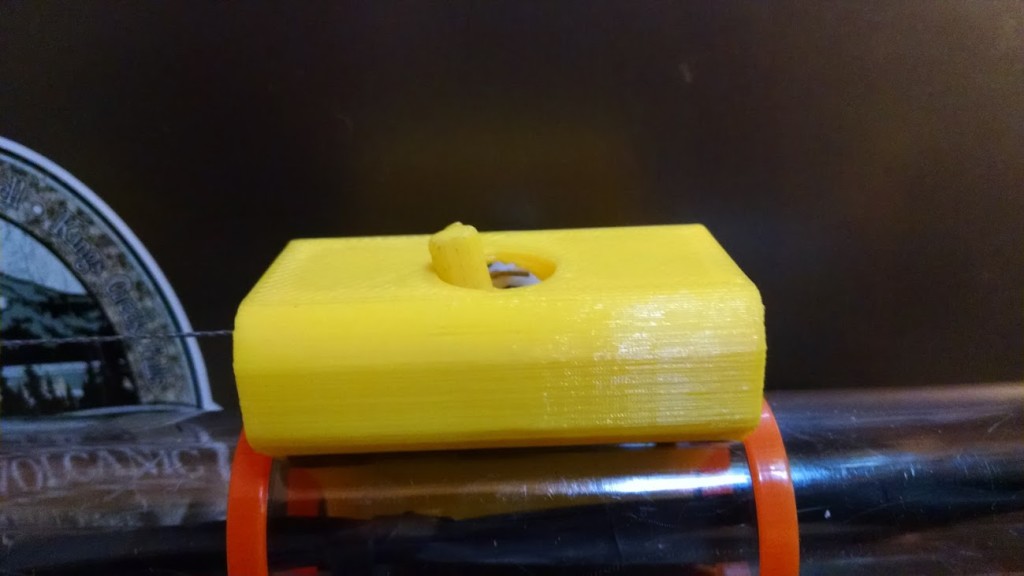
Insert the servo into the trigger receiver such that the wires line up with the slot and hole. Mount the receiver to the center of the tube with zipties. Mount the end catches to the edges of the tube, making sure that they’re inline with the receiver. Tie off the elastic to one stopper and feed it through the tube. Tie off the elastic to the other stopper such that there’s enough tension to snap tight. Measure out enough fishing line that the stoppers are held open when the line is pulled to the center of the tube.
Here’s the trick bit. One side of the receiver has a groove that allows the wire from the servo to slide in. Tie the pin to the rubber stopper on the non-wire-side of the receiver, there’s a small notch that indicates where the pin should be tied. Tie a big loop in the other line. Mount the trigger underneath the plastic arm of the servo with a paperclip. Lock the servo arm in place such that when fully extended trigger-side, the trigger rests tightly in the vertical slot in the middle of the receiver. You may have to power on the servo to determine where the fully extended position is. Wire up the servo to your control unit of choice. Walt Holm has some excellent advice for connecting to an OpenROV control board.
If you’re mounting to an OpenROV, mount the OpenROV clip to the front two bars of the payload bay and zip tie the bottle underneath.

Priming

Pull the pin-side rubber stopper up through the catch as shown. Slide the pin into the receiver and rotate until the post comes up through the center hole. Rotate the trigger into place. Pull the rubber stopper off the catch and place it in the open position. The pin should lock in place. Now open the other stopper, slide the loop through the receiver slot, and loop it over the post on the pin. The pin will catch, rotate, and lock against the opposite side of the center hole. This positioning ensures that when the trigger is released, both end will be freed simultaneously.

Triggering
Using your controller of choice, activate the servo. Both stoppers should slam shut as soon as the trigger clears the pin.
And that’s it. You are now able to take discrete water samples using an underwater robot, aerial drone, or hand cast. Feel free to modify these designs to suite whatever needs you have, though please respect the BY-NC-SA creative commons license.
Go forth, and do good science!
As in previous posts, you’ll notice that I’ve used Amazon affiliate links throughout. I get a small commission when you purchase something through those links, which goes towards server costs and other fees associated with running Southern Fried Science. If you decide to build your own Niskin Bottle, and happen to source your parts through Amazon, please consider using one of those links to help us out.
Why poly-carbonate (instead of for example schedule 80 PVC), is it just availability on amazon?
I wanted something clear so that I could see how everything was fitting together and moving while prototyping. You can use any material you need for the tube.