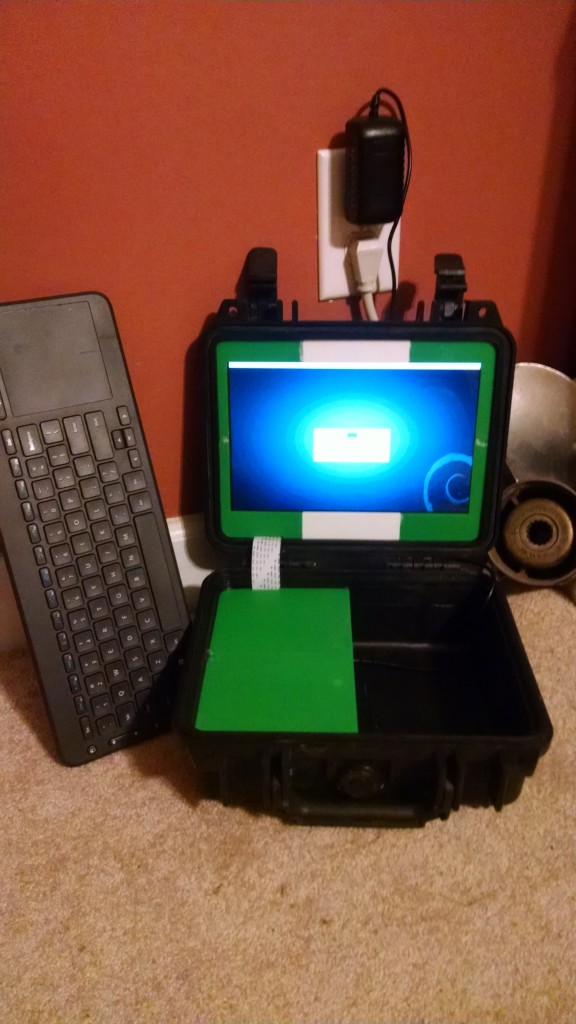
 For and updated version of the BeagleBox, please go here: The BeagleBox 2: a dirt-cheap, tough-as-nails, 3D-printed, versatile field laptop.
Fieldwork is tough. You’re in the elements, facing wind, rain, and salt spray, sometime on an open boat far out in the Atlantic. You and your gear takes a beating. But you’re out there because there’s science that need to get done.
But your equipment is controlled via computer, and your data entry mandates a computer, which means your precious laptop needs to come with you. For graduate students and early career scientists, this can be a dilemma. I’ve see the calculations happen as my colleagues prepare for the field–do I take my one and only computer out into the field and risk damaging it, or do I leave it brute-force my way through sampling without it. That is, if they’re lucky enough to have alternative methods they can employ. For some gear, there’s no choice but to take the computer.
This equation is, counter-intuitively, getting worse. Our sensors, sampling devices, and scanners are getting cheaper and lighter. Rather than buying a $20,000 piece of equipment, you can get a $20 chip, but there’s a trade off, and the trade off is that chip based systems rely on external processing power, they need a general computer, and that means your laptop is coming with you.
I don’t like going out on the water with my laptop. Losing it would be frustrating and time consuming. It’s tough, but it’s not tough-as-nails. And it’s definitely not cheap.
So I tapped into the wealth of Maker experience I’ve accumulated over the last few years and build a new one, using a single board computer, some extra peripherals, and a 3D printer. And I shoved the whole thing into a Pelican case. Say hello to the BeagleBox, a dirt cheap, tough-as-nails field computer for about $200.
Building a BeagleBox is pretty simple. The heart of the machine is a BeagleBone Black, a small single board computer. You are definitely not going to be blown away by its 1 GHz processor, but we’re not building a high-throughput genome analyzer, here, were building something that can handle the basics and get beat to hell. Here’s the bill of materials:
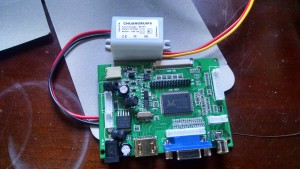
All told, the BeagleBox tops the scales at a touch over $212, and that’s if you bought everything new. To connect all the electronics, I first soldered the 12V to 5V converter directly to the 12V and ground outputs on the JB Tek control board, then pulled the barrel plug of the 5V AC adapter and wired it into the converter’s output. The result is that you can now power both the screen, which needs 12V, and the BeagleBone, which needs 5V, off a single AC adapter. As an extra bonus, the BeagleBox now needs 12V direct current, so you can run the computer off a boat battery, car battery, or any of a squillion different battery options without any special converters, all you need is a the right plug or clamps. (and, of course, watch those amps).
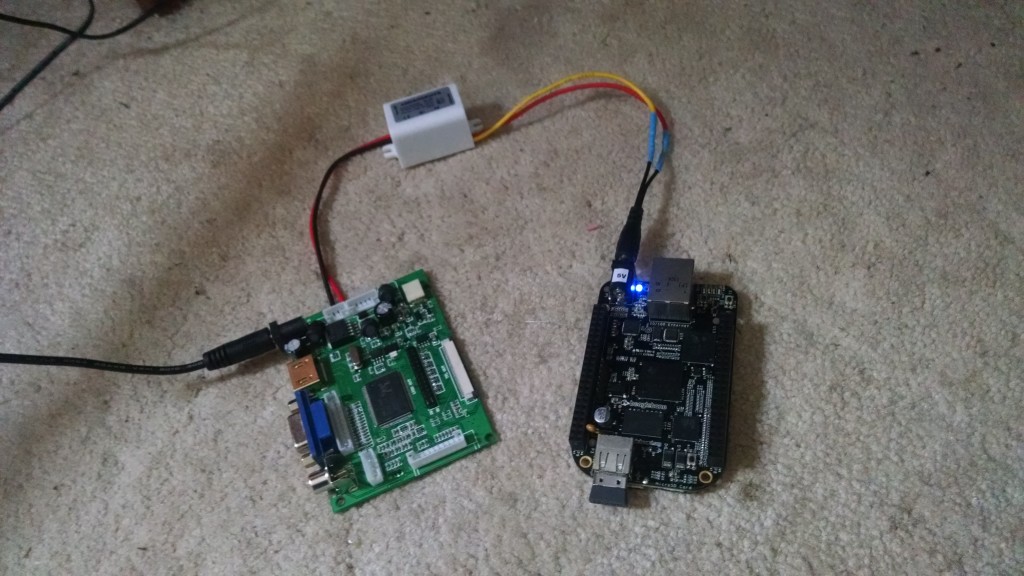
The BeagleBone sends video out a micro-HDMI port, the monitor accepts standard HDMI, so you need a the right cable to connect the two. After that, all you need is to plug a USB hub into the single USB port, and you’re ready get your software set up.
I use the latest Debian image from BeagleBoard.org (did I mention this is a Linux machine?) paired with the LXDE light-weight GUI. If you’re new to Linux, now is a good time to read up on the basics of the operating system and familiarize yourself with how it functions, but once you have LXDE installed, you’ll have a reasonably intuitive desktop with a start bar and some basic programs. You’re going to want a mouse and keyboard, any USB devices will do, but I like this one, for its simplicity. If, however, you’re mostly going to use this for something other than data entry (for example, flying an OpenROV), one of these little guys will actually fit in the Pelican case with everything else.
Now, for the fun part, 3D printing. I designed a shell around a Pelican 1200 case. It’s just the right size for the screen and gives you plenty of extra space to store whatever else you need to store in the case. The shape files are available on YouMagine. I printed everything on a PrintrBot Simple Metal, with no problem.
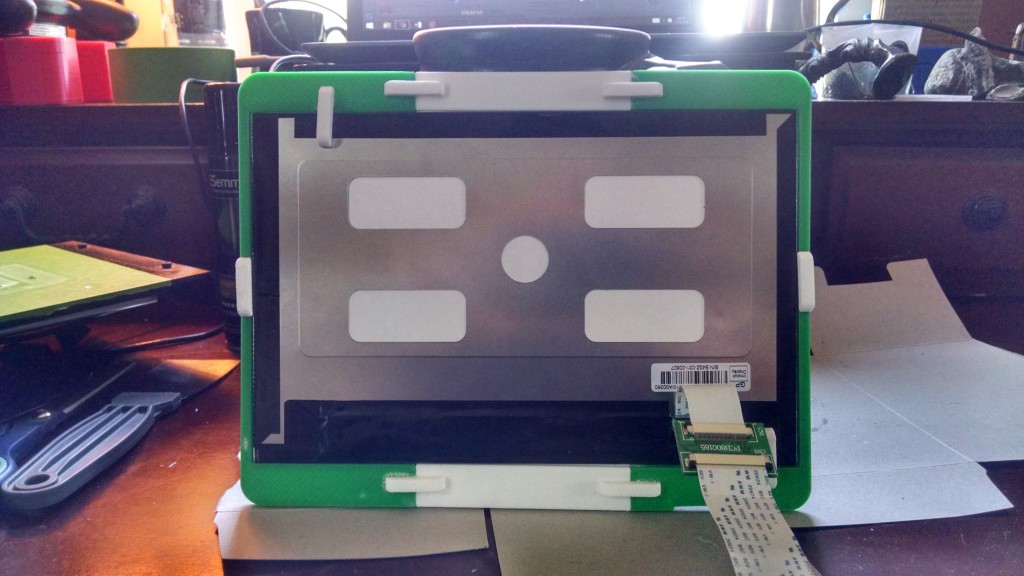
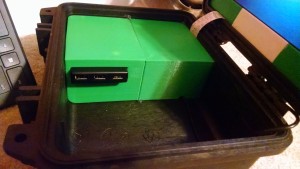
To assemble the shell, I use SciGrip4 Acrylic solvent and hot glue, but any adhesive will do. Hot glue seems to take to PLA particularly well. The small tab brackets go on the back of the screen mount, and both hold the frame together and keep the screen in place. The main shells slot into the Pelican case and are help on with a little bit of hot glue. The USB hub slides through the large rectangular port and the power cord comes out the small semi-circle. Everything should be very snug.
And with that, the basics are done and you have a bare-bones field computer. Not only that, but by the end of this build, you should have the confidence to expand on this design. There’s a million different ways to modify it to suite your needs.
Before we get too excited, let’s talk about the limitations. The BeagleBone Black is slow to boot. It takes a bit over a minute. Once it’s running it’s fine. Not mind-blowing, but perfectly serviceable. You can’t run everything on it, but you can run a lot. You are stuck in the Linux ecosystem, but many people consider that an advantage. There is a learning curve.
There are a few things that should seem essential that I didn’t include in this build. Obviously there’s no WiFi capability. That can be easily fixed with your preferred USB WiFi dongle. There are also no batteries, though there is a plethora of power options out there. This first build was about getting the machine working, the next one will be about perfecting.
Some thing I’d like to add: A 5mm barrel jack on the outside, so I can plug in different power options without opening up the shell, as well as a power/kill switch (right now, “on” is triggered by plugging it in). I want to add a long-range WiFi antenna, both for signal and to fly an OpenROV from a distance, as well as a more accessible Ethernet port.
When closed, the case is waterproof and super durable. Even when open, there are no moving parts to break. If a component does fail, it’s easy to swap out. The BeagleBone may be a limit, but there are dozens of other single board computers you could use instead, and even some full-fledged PC-on-a-stick systems would plug right into this set-up, with more coming every month. The BeagleBox can be infinitely customized to match your field needs. But, most importantly, it’s cheap.
In the interest of transparency, you’ll notice that I’ve used Amazon affiliate links throughout. I get a small commission when you purchase something through those links, which goes towards server costs and other fees associated with running Southern Fried Science. If you decide to build your own BeagleBox, and happen to source your parts through Amazon, please consider using one of those links to help us out.