I have a problem with the OpenCTD.
The OpenCTD is a low-cost, open-source oceanographic instrument that lets you take fundamental water quality measurements for a fraction the cost of commercial alternatives without sacrificing data quality. It’s rated to 140 meters, and we’ve tested that, once, in a bathymetric chamber, and then, occasionally, in the field. Practically, most OpenCTD users are working in 50 meters or less.
Because the OpenCTD is built by you, an ocean knowledge seeker, and not manufactured by a commercial enterprise, the quality and durability of the housing will vary depending on the maker.
We need a way to test OpenCTDs. Mostly, I do that in the field, during CTD building workshops. In an OpenCTD, most of the expensive components are fully encapsulated in epoxy. Even in a catastrophic failure, where everything floods and the electronics are compromised, only about $60 worth of parts are lost. So if you want to make sure your house is good, you can just take out that control unit and do a wet test with all of the delicate parts removed. Easy.
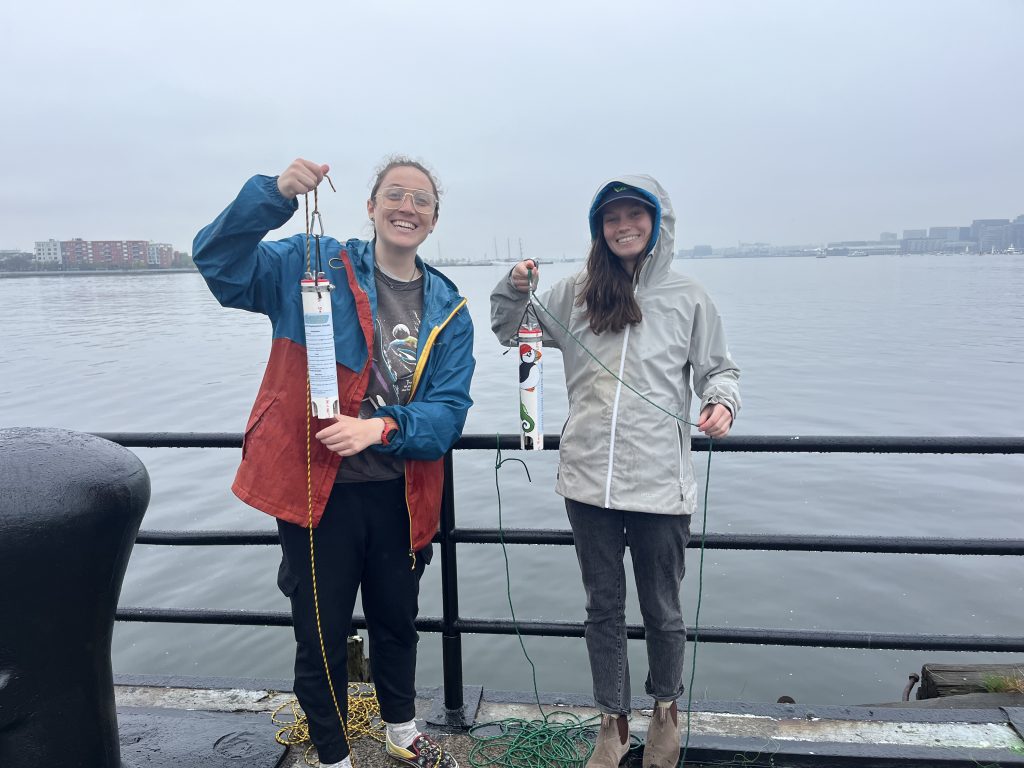
That’s exactly what we did at the Boston workshop, where we ended up chasing bad end caps until we discovered a problem with the O-rings. Many floods happened, no CTDs were lost, and the workshop concluded with two finished OpenCTDs that had been extensively tested to the depths they would be operating at.
I live on the Chesapeake Bay, America’s largest estuary and the biggest impact crater in the continental US. The Chesapeake isn’t all that deep. On a good high tide, I can get to about 2 meters of depth within a short trip. To get to 50 meters, I need to go offshore, and that requires a boat, a crew, and at least a day . Great if you want to spend a day at sea, but when I’m in the midst of testing new updates to the OpenCTD, building CTDs for other ocean knowledge seekers, or chasing down problems in previous builds, being far from deep water is not so ideal.
I need a way to get to 50 meters, preferably without leaving my office. I need a pressure vessel.
They say that there is a fine line between genius and madness. That line is the street that runs from my toolshed to Harbor Freight.
I built a hardware store pressure vessel to depth test the OpenCTD.
For your situational awareness, pressure vessels, even the relatively low pressure vessel I’m building here, are inherently unsafe. Catastrophic failure can send shrapnel flying, possibly directly into your eye. Even if the vessel itself is strong, the devices your testing may not be. An implosion inside a pressure vessel can cause critical damage to the vessel itself. Wear appropriate protective equipment and make sure there is a barrier between you and the pressure vessel. Distance is your best friend.
The secret to this project is that the force of 50 meters of water pushing down on you isn’t all that much, relatively speaking. At 50 meters in freshwater, the pressure pushing down works out to a little less then 71 PSI or 5 Bar if your fancy. Step one was identifying an appropriate commercial product that could both fit an OpenCTD and be pressurized to at least 72 PSI (and the more, the better). The answer is whole home water filters.
I found a good, well-reviewed, whole home water filter housing designed for 4.5″ by 20″ filters and rated to 90 PSI. It fits the OpenCTD with room to spare. I could even do two at once.
Now we have to pressurize it, so it was off to Lowes and Harbor Freight to find air hose fittings and the cheapest compressor I could find that matched those specs. The water filter uses 3/4″ threads and most air hose fittings are 1/4″, so I had to get a suite of brass downsizers. For safety, I added a 90 PSI burst valve in line with the compressor to minimize accidental over pressurizing. A ball valve on the outlet end allows me to bleed any air left in the system.
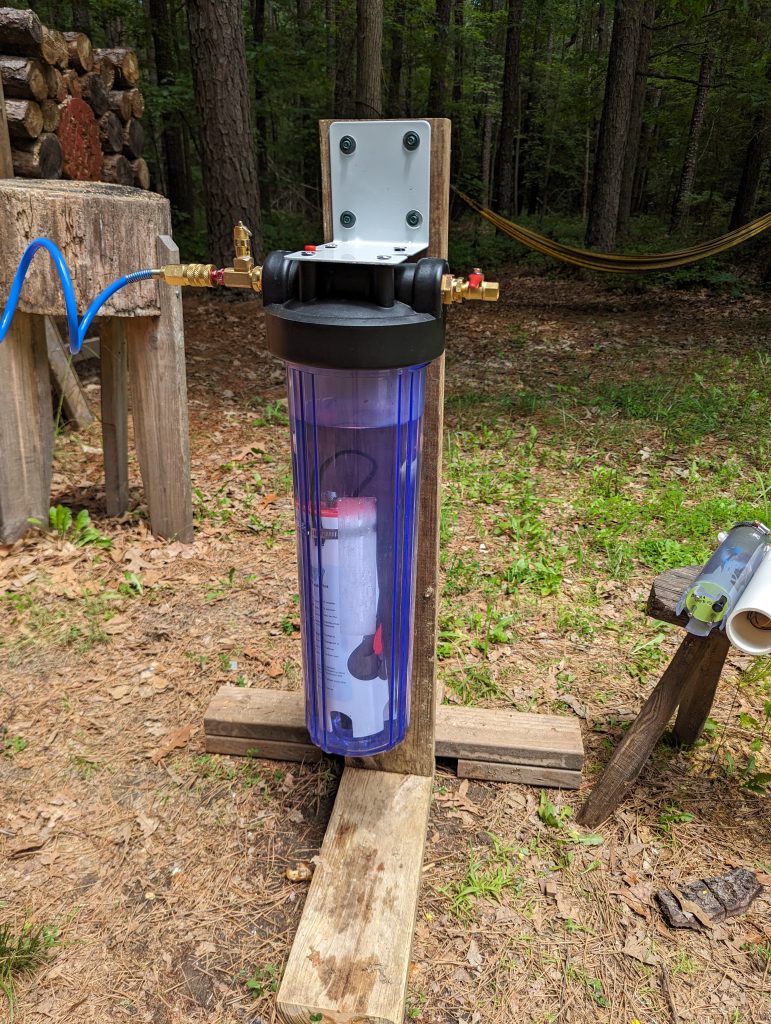
Now all that is left is to hook up my trusty $99 Lowes air compressor (which tops out at 150 PSI), drop an OpenCTD into the filter housing, and add some air.
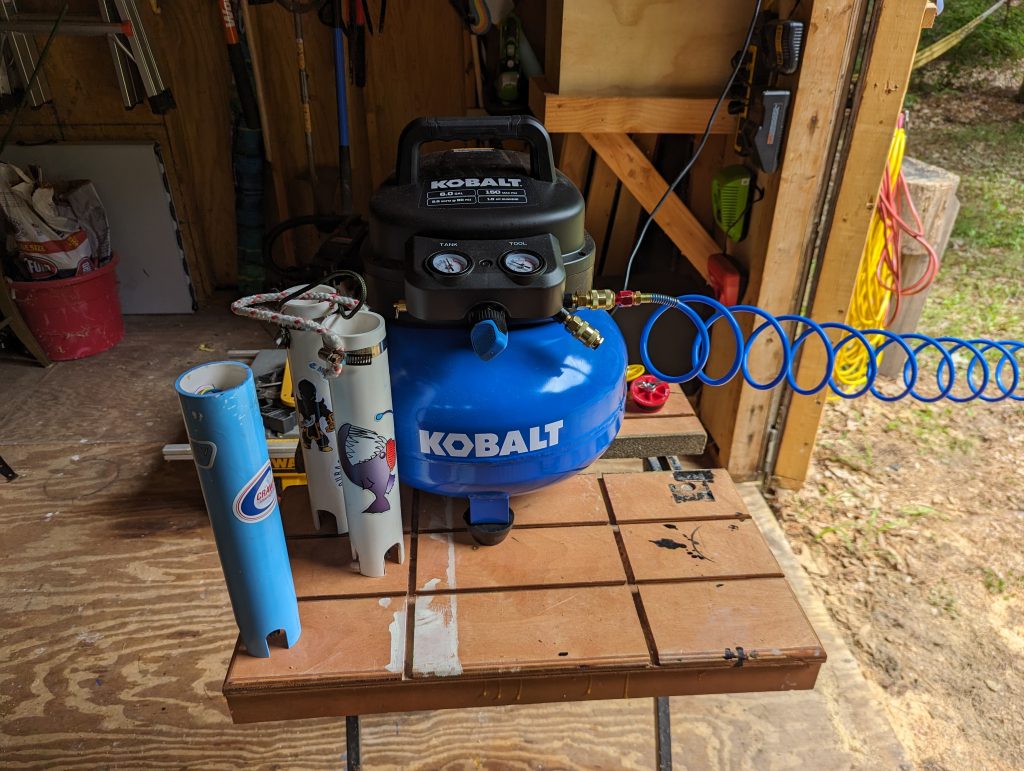
The final set up have about 15 feet of distance between me and the pressure vessel, with a thick piece of 3/4″ plywood between us. After the first few hair-raising tests, it was pretty clear that this setup wasn’t going to explode catastrophically. It was time to take some CTDs to depth.
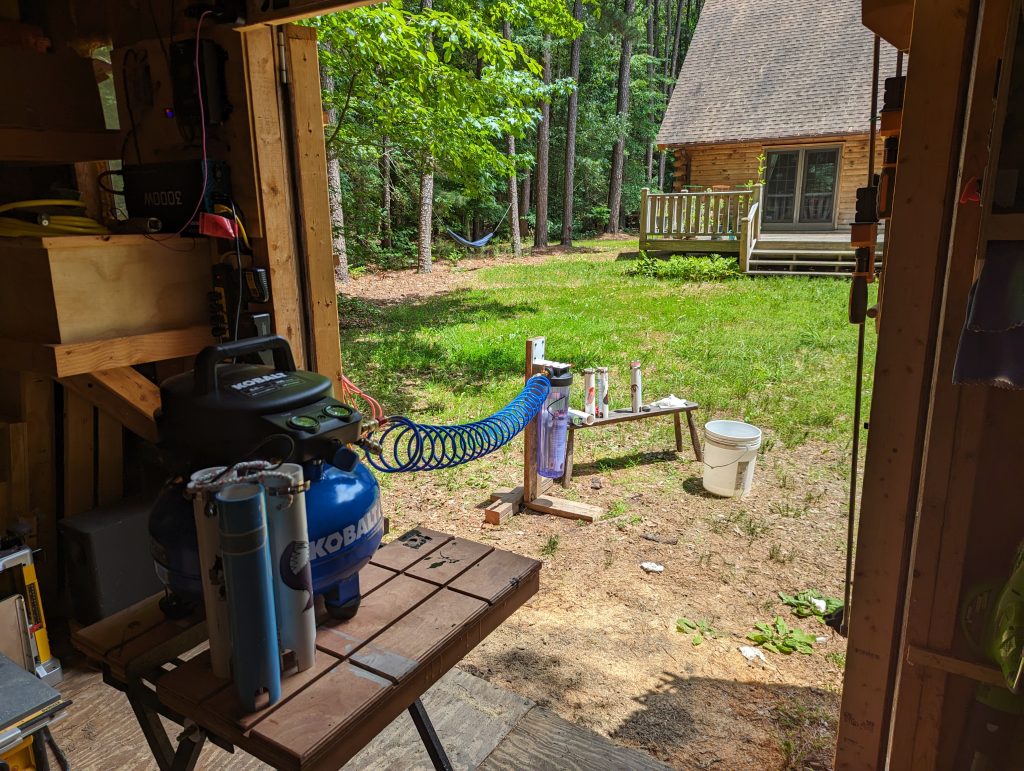
This horrifying kludge of hope, hardware, and Harbor Freight worked so much better than anticipated. Bringing a CTD down to the equivalent of 50 meters depth, in controlled pressure vessel that also happens to be clear does wonders for testing, experimenting, and troubleshooting.
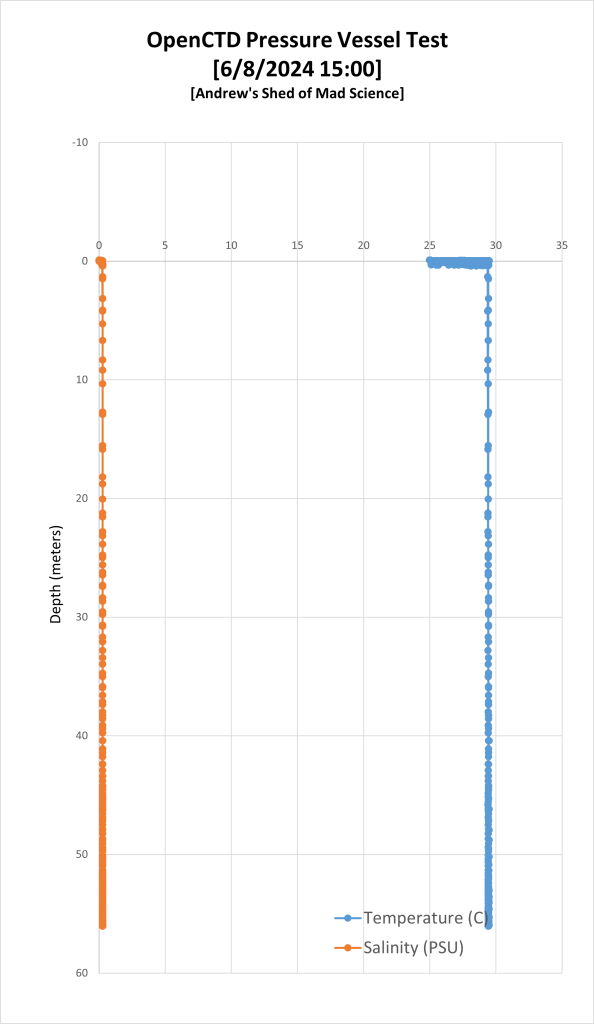
One of my long running frustrations is that sometimes, OpenCTDs built perfectly fail, and because doing a series of long, deep CTD casts off-shore doesn’t not lend itself to hardware troubleshooting, we often don’t have a chance to really dig into every component to find out exactly why that failure happened. Now that I can take my CTDs to depth without leaving my shed, I can tweak and experiment and compare, chasing down and fixing those annoying points of failure before we reach the sea.
You want to see a CTD fail? I set up the clear CTD with a known bad end cap so you can watch it flood. Enjoy.
I was hoping for a more dramatic implosion, but there’s always next time.
This system works as intended. For a 50 meter vessel, the only change I want to make, and it’s not an essential change, is the add a pressure gauge to the housing end, so that I can get the pressure readings in the same shot when I video tests.
Of course, this is just the beginning. Having a tool to test our base OpenCTD is incredibly valuable, but the OpenCTD is my only project.
We want to go deeper.
We need to go deeper.
I do have a line on a stainless steel housing rated to 300 PSI, which gets us past 200 meters. There are also fiberglass reinforced reverse osmosis system housings rated to 1200 PSI, which lands a little shy of 850 meters. But now we’re getting into scary pressures that little shop compressors can’t handle.
For now, I’m pretty happy with a purpose-built tool to help make the best possible OpenCTDs.
In the process of writing up this post, I discovered that our friends at the Cave Pearl Project had done something very similar using a small water filter housing and a bike pump. Let this serve as a reminder that you should always keep up up with the Cave Pearl Project. They do great work.
Southern Fried Science is free and ad-free. Southern Fried Science and the OpenCTD project are supported by funding from our Patreon Subscribers. If you value these resources, please consider contributing a few dollars to help keep the servers running and the coffee flowing. We have stickers.
